***If you have a new shipping address please do email me to let me know your order numbers and the new address. Check your order email and our email communications (if applicable) to make sure the latest address I have on file for you is the correct one. If you’re waiting on your order to ship, please check the junk mail folder for shipping confirmation emails every now and then to be safe!
(As a brief update, the container ship arrived a few months ago and I have been busy mailing out lots of keyboards and will continue to go through the backlog. I expect to finish up this month (August) with all of the remaining keyboards and other orders in the queue (as of now, all the remaining 2021 and 2022 orders). Sorry I cannot provide estimates for any particular order in the queue as noted before; please see the below posts for additional details. Since I ordered a bunch of extra keyboards, there is still time to customize your Brand New Model F Keyboard and add on accessories like the First Aid Kit for future repairs, the new solenoid driver and extra hefty solenoid, the transparent relegendable keycaps just made from new molds, extra key sets and USB cables, etc.)
So far I have mailed out 1,487 Brand New Model F Keyboards since early April; we have about 400 keyboards remaining in the backlog.
Mini-meetup in NYC – September or October? Please email me ASAP if you can offer a space
I have been generously invited to speak about the project at the NYC office of a well-known tech firm. I’d like to schedule it for a Wednesday in September or October (leaning towards October), after I’ve caught up with the backlog. Their meetup is just for company employees; I was thinking of a mini-meetup open to the public on the same day in the late afternoon.
Is anyone willing to host a mini-meetup in Manhattan that would be open to the public? The space would need tables to show off any keyboards that folks bring there.
Keeping the original xwhatsit firmware alive
Is anyone up for creating a “0.9.3 version 2” firmware for the new 33 pin controller I’m testing this week? The changes are that caps is pin 18, pin 19 is Num, and pin 17 is Scroll. Because of these hardware variations, this will have to be a separate firmware version. In QMK here were the changes: define HAPTIC_ENABLE_PIN B7, define SOLENOID_PIN B6, define LED_CAPS_LOCK_PIN B4, define LED_SCROLL_LOCK_PIN B3
Interest Check: Pad Printed New Model F Keys
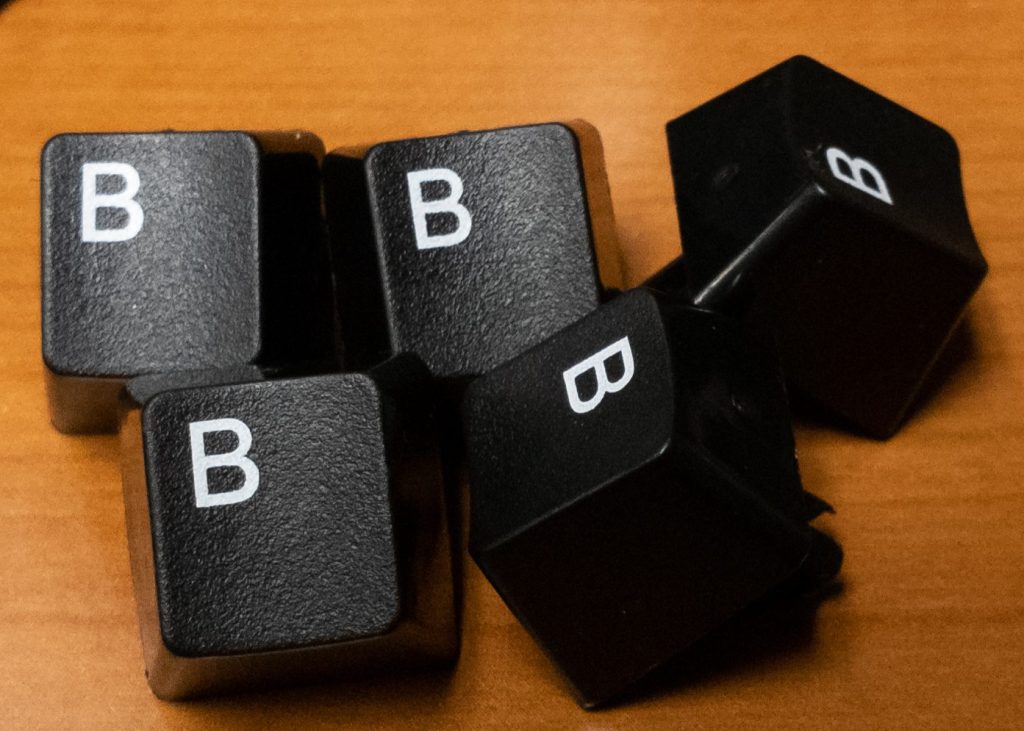
I am reviewing samples for the pad printing with the plan to offer white text on black keys, which is a common request. If interested in black pad printed Model F / Model M keys please sign the interest form here to reserve your set: https://forms.gle/qnUATUrng8bX9Qxt8
Here are some of the recent pad print samples. Of course the samples do not have the correct alignment of the finished products. Please disregard the cell phone quality of the photos.
Interest Check: ISO Black, Dark Gray, and Industrial SSK Blue key sets, Code Keys, Big PC AT style Enter Keys?
I am looking into making a mold for the ISO non-stepped Enter key (currently we are using Unicomp keys for this key as noted before, and they cannot make the additional colors for black and for gray and blue to match my project’s key colors). This would allow for key sets with ISO Enter to be made in additional project colors black, 60% dark gray, and Industrial SSK Blue. I will probably make the key non-stepped just like the other keys are all non-stepped.
If you are interested please fill out the Google form below to note which sets you’d like. To help pay for the mold each set will cost $20 extra, a total of $99 instead of $79 for each set. The key could also be ordered for $20 individually.
https://docs.google.com/forms/d/1vsamkl_jOqp6wAEfZGeivQZ8ZaibpoT0WQkDG39r08Q/
Switching from HHKB style split right shift to standard right shift and vice versa – possible?
Unfortunately you cannot do a 1.75U+1U HHKB style split right shift on the non-HHKB boards as the barrels and PCB pads are in slightly different locations. You can do the 1U+1.75U JIS style split right shift on the non-HHKB boards.
The most common setup issues:
Many folks recently have not read the manual before trying to set up their new keyboards, as detailed in the prior post. Please read the manual fully from beginning to end before setting up your keyboard to avoid headaches. All of my troubleshooting knowledge, learned from the forums over the years as well as from my own QC work while mailing out the new Model F Keyboards, is in the manual. Please don’t try to do any steps not noted in the manual. Some people think the keyboard is defective but in fact it was just not set up properly. If only one or two keys is acting up, is likely that the 2 controller screws need tightening, some springs need adjustment or replacement, or debris has entered the inner assembly between the flipper and PCB (this third option is far less likely). When lots of keys are not working, most likely the user did not read the very first bolded paragraph in the green booklet included with each keyboard (“Do not set up your Model F Keyboard until you have reviewed the instructions and troubleshooting guide available at ModelFKeyboards.com/manual where you can find instructional videos and valuable advice like “hold the keyboard vertically, space bar side up when installing keys.”).
Transparent relegendable keys currently available
Just wanted to leave this note here that you can currently get transparent relegendable Model F / Model M key tops made from brand new molds as part of the Brand New Model F project I am coordinating: https://www.modelfkeyboards.com/product/clear-relegendable-cap-stem/
Mine are exact reproductions of the IBM 4704 caps.
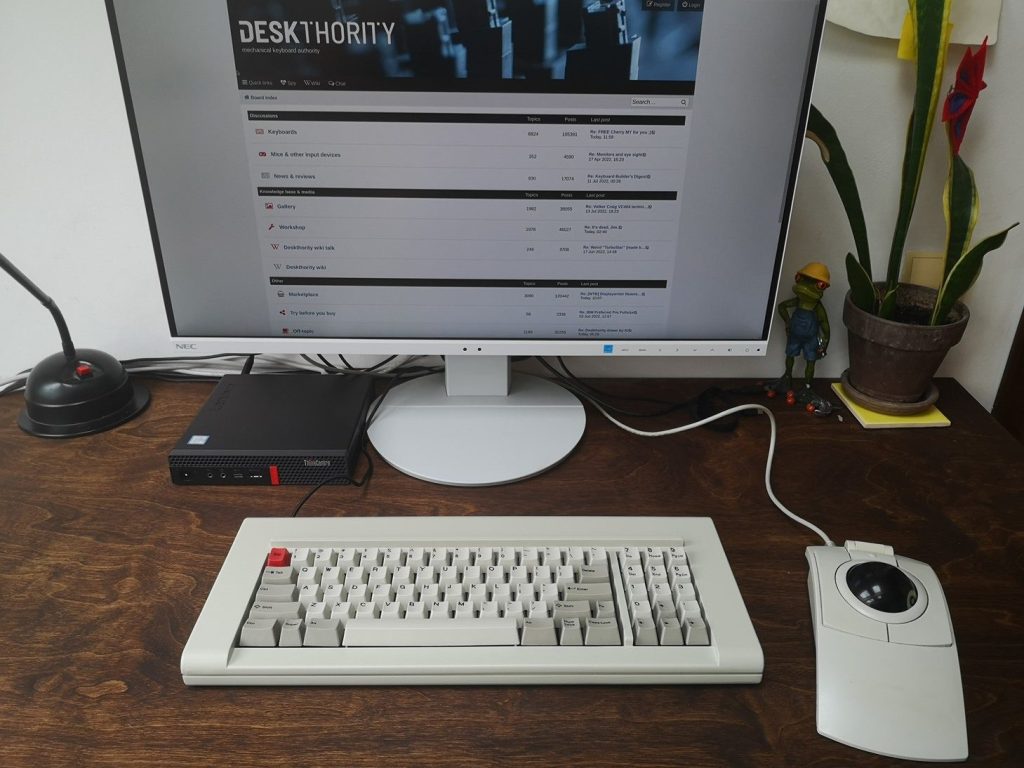
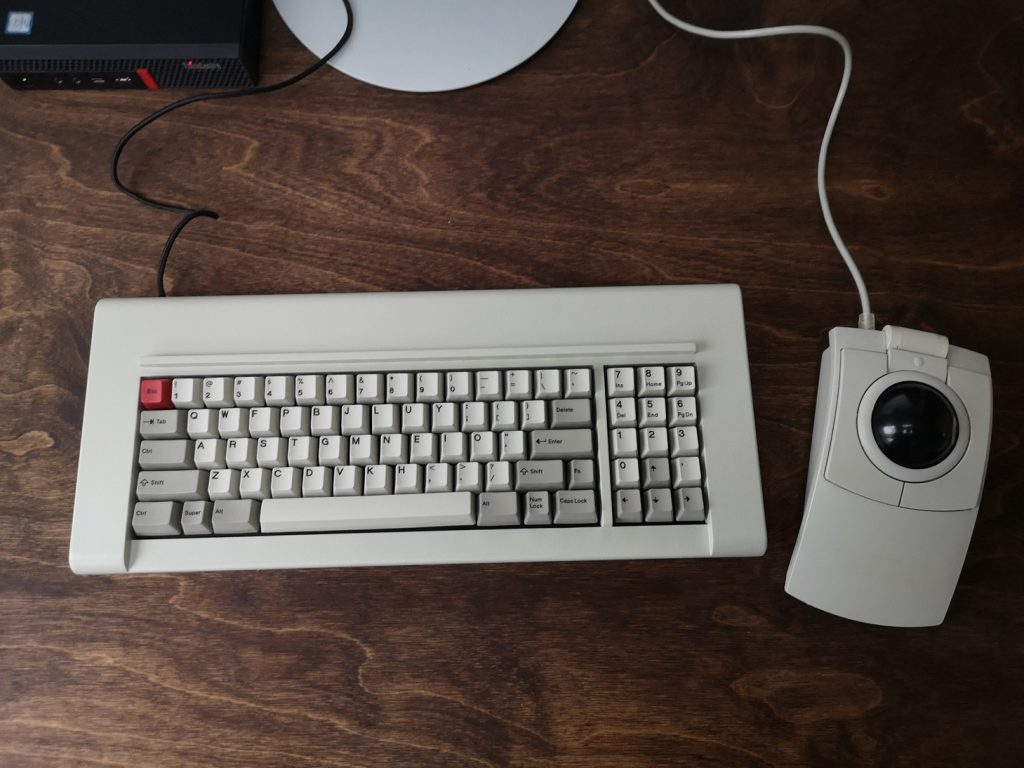
Some great Brand New Model F keyboard photos, reposting with permission:
A customized UK set as well as the black unprinted set
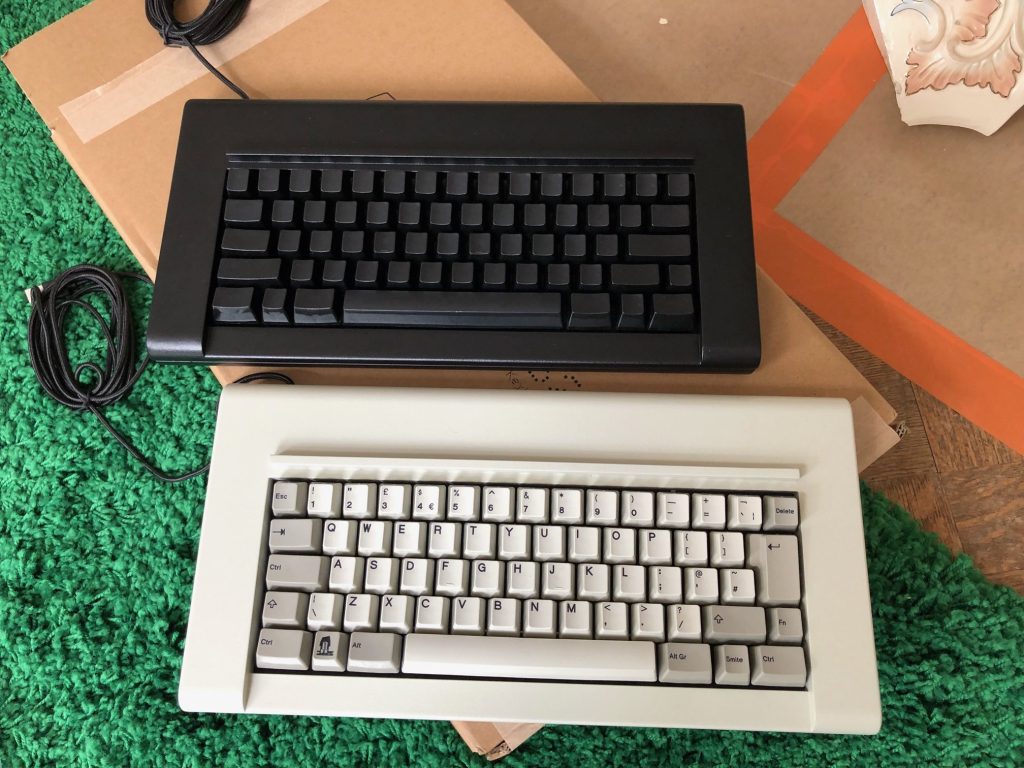
The next two photos are from a user of both Colemak and QWERTY who was wondering if the keys could take a few dozen removals/insertions if they switch frequently between layouts – any experience with the durability of Model F key stems? Mine are the same exact material as what IBM used so it should have similar properties.
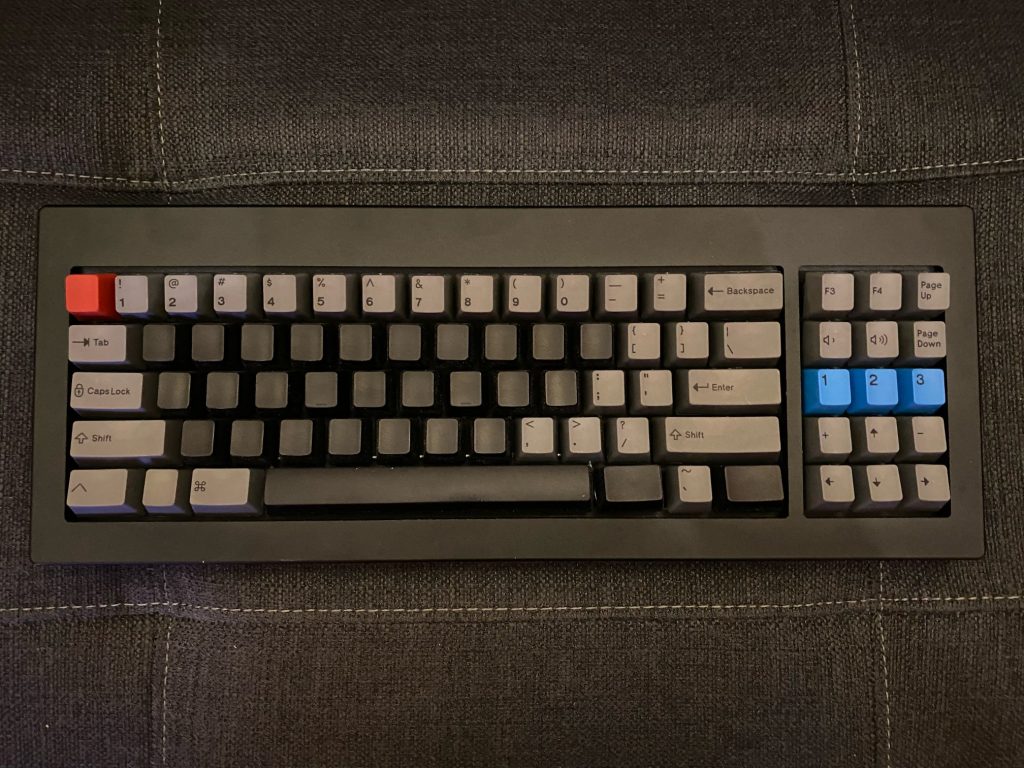
A layout that includes black keys and dark gray keys
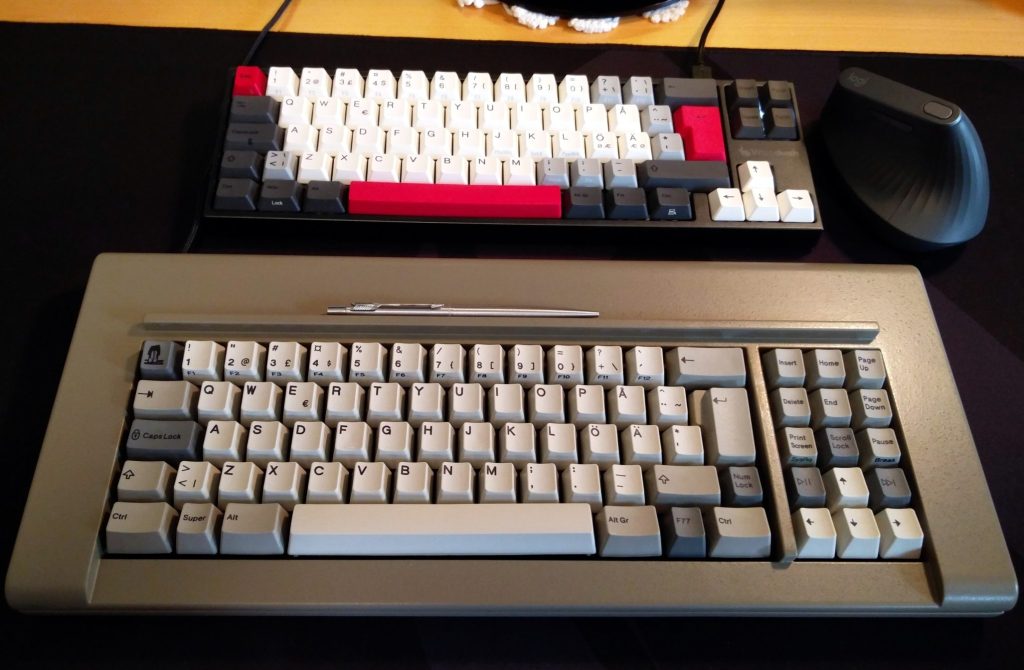
A customized Swedish-Finnish layout
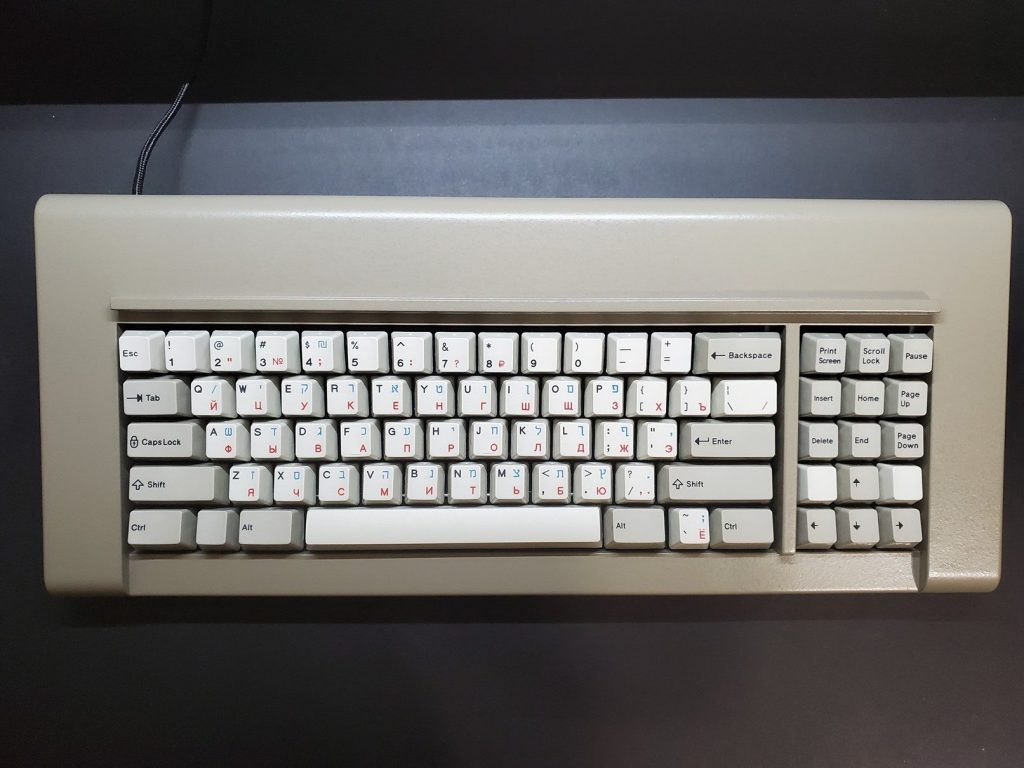
From a user of the Russian-Hebrew-English set – nice colors and nice work by Zed on this special request layout.
I’m open to additional super low volume sets as long as someone volunteers to design the unique/additional legends for the particular set – including front print only sets with all the legends front printed, as well as the other sets noted. Other folks would have to help by designing the sets’ additional legends (I can send the template file to you if anyone is willing to help). Please note that any sets involving front printing will cost more as that process is trickier for the factory to get right.
Zed has been so incredibly helpful with making sure the keys are up to IBM’s design and alignment standards that I am wary of making too many more additional requests especially for the ultra low volume requests, so someone would have to help with these.
The factory can even do green, red, and blue for the sublimation text/graphics and multiple colors can be printed at the same time and on the same keycap, as shown in the three Russian-Hebrew-English photos below. If anyone wants one-off sets in various colors it is possible, though some sublimation colors come out better than others and you’d have to make them to find out. So far green, blue, and red have come out nicely.
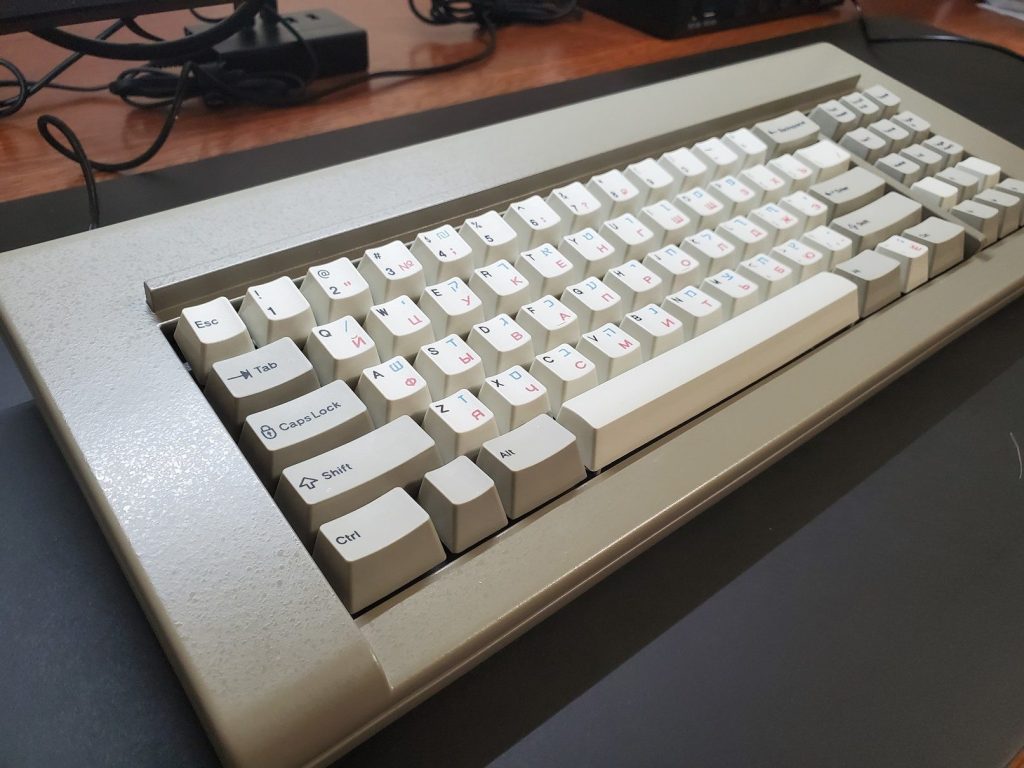
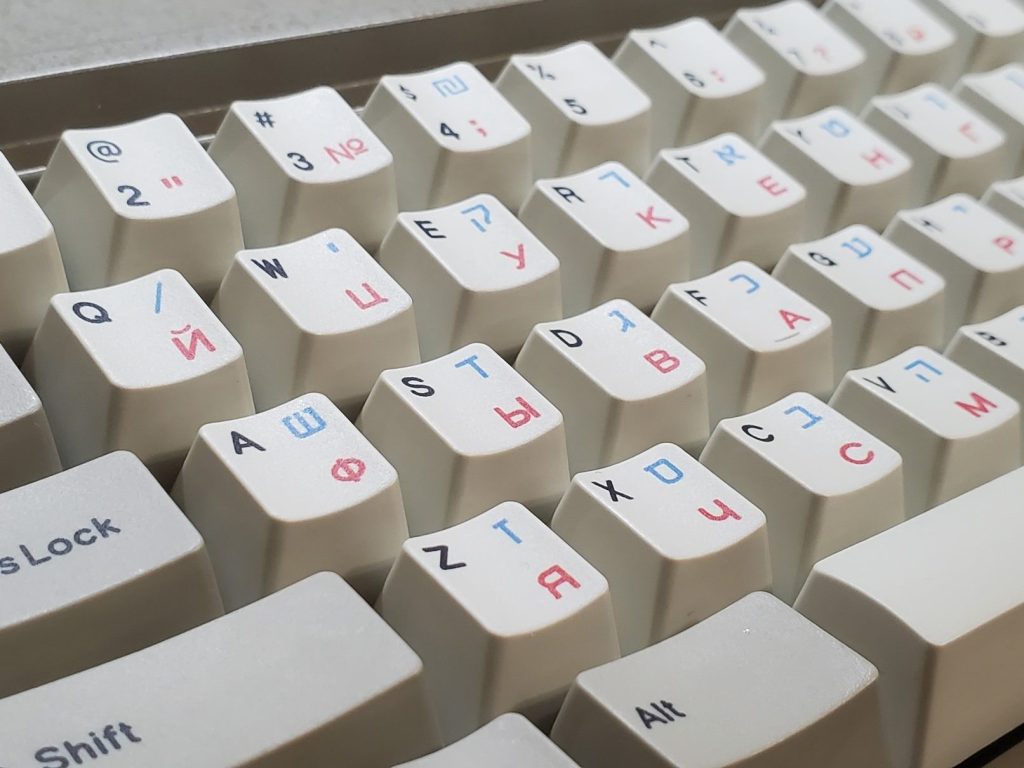
Showing off some of the new Extra Keys (some of which recently arrived from the factory: terminal, 4704, Icons, Extras, num pad/right side blocks, front printing), as well as some customized transparent relegendable keys, which allow you to print graphics for both the top and front of the key so you can have a custom key with custom front printing for multi-functionality. This may be one of the first photos I’ve seen with a near-original 4704-style configuration! Here are some details on the fonts used: “most the numbers are whatever font IBM used. It looks like Public Sans though. The period is Public Sans too. Fira Code for the two slashed zeros, after seeing a picture of a model M style macro pad with that on. Finally, my Wheelwriter uses Prestige Elite at 12 cpi. That’s what all the VISA CREDIT stuff is written in. All the words [on the relgendables] are Prestige Elite. I typed it manually on my wheelwriter.”
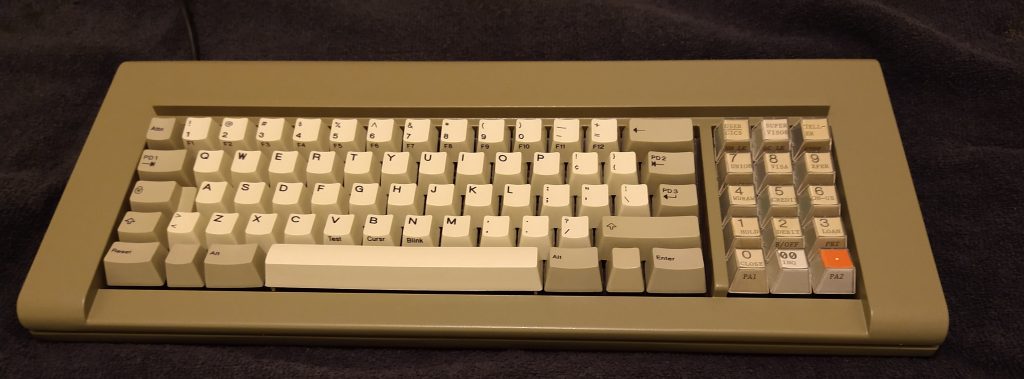
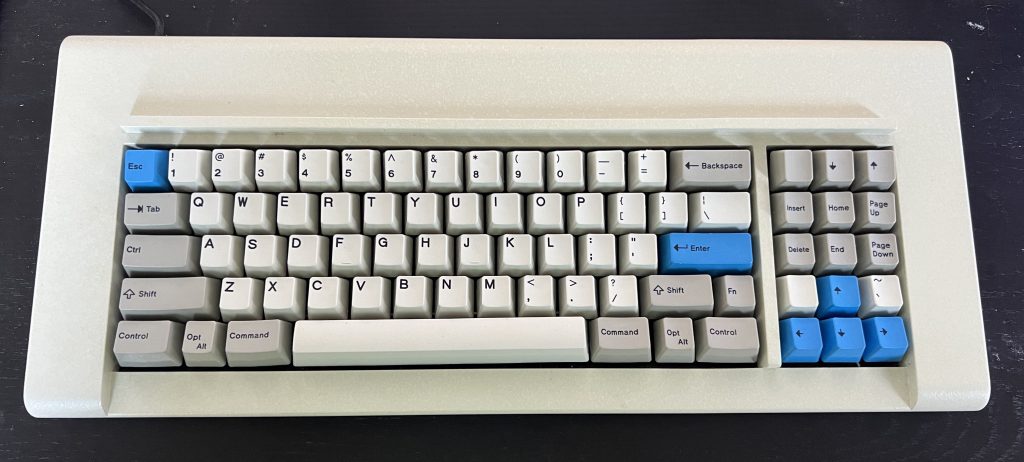
A unique layout featuring the Mopar Blue keys and Apple/Mac keys
Brand New Beam Spring Project update
Here are the first photos (see the link below) of the prototype beam case and the top and bottom inner assembly plates. They will be making a full prototype with these parts before we proceed. As noted before this is just a test to make sure everything will fit together and work together. The design is likely to change (an angle to the case was added but not for this sample, etc.) and I’m not sure yet if I’m making molds for a few beam cases so you can pick a 3278 style beam spring for yourself or a 3101, etc. Each case style will also have different layout options ideally so there may be a 104 style and a less wide SSK style case.
These are just powdercoated smooth black for the tests as opposed to the bumpy original style texture expected on the finished products.
Click here to view the photos: https://deskthority.net/viewtopic.php?f=50&t=26174&p=505612#p505612
The goal is to have some cases inspired by the profiles and designs of various IBM cases, assuming the mold exterior parts can somehow be combined to keep costs reasonable (then it would just require different mold cores).
My first IBM style design posted a couple months ago was a combination of some IBM cases but I’m thinking maybe I should just do one case for each main variety (5251, 3278, 3101, maybe the 66 key beam spring?).
Of course of we go with a mold instead of CNC milled, the bent tabs for the top case would be removed and you would not see them. The top and bottom case would be assembled with posts on the inside of the top case.
Below are some details on the beam case design, to be more in line with the originals.
Top case (now at an angle as requested)
…..Top inner assembly (“TIA”)
……….Inner foam
……….Beam Module
……….PCB
……….Foam or rubber sheet below the entire PCB
…..Bottom inner assembly (“BIA”)
Bottom case
Notes on the PCB: the PCB is secured to the top+bottom inner assembly in a different way from round 1. The PCB touches the area where the top+bottom inner assembly are screwed together. To avoid issues, because the metal inner assembly cannot touch the PCB, on the top side, there is a small mylar strip glued or taped to the top inner assembly as you would see with the original IBM beam spring keyboards. On the bottom side of the PCB, the large foam mat has some holes in it for the screws so that the PCB does not contact the metal parts. The PCB and foam pieces are not shown in the photos (you can see a gap where the PCB would go, in between TIA and BIA.
The new TIA has slightly larger holes in the TIA, so that the modules will not fit into place. This will make assembly less secure – the beam modules will not be securely installed in place in the TIA; instead they will only be secure when the inner assembly is completed. Before then, the beam modules can be easily moved out of place. The reason for this is to reduce the contact between TIA and the beam module, in order to reduce the sound (that is why a foam is added). The foam allows a reduction in the noise of the mechanism. The goal is to eliminate the ringing sound when typing. This part was not in the previous beam design. The colors shown are all false colors designed to maximize visibility/contrast of the various parts. I expect the TIA to be black and BIA to be the same IBM gold type finish.
Screws: Case screws will be hex countersunk/flat top, 6-32, 1/2″. Inner assembly screws will be standard + Phillips, the same used with the F62/F77. The TIA has holes and the BIA has threaded holes. The threaded holes are not shown in the photos.
New controller design for the RP2040 Raspberry Pi chip
Check out this great project to create an RP2040-based controller for capacitive buckling spring keyboards.
https://geekhack.org/index.php?topic=117555
Vial firmware note
I received some interesting Vial news: “There’s even a web configurator so there’s no need to install client software if you don’t want to/if you’re on someone else’s computer: https://vial.rocks – instant keyboard configuration and experimentation from a web page! ” Seems to be useful for updating your Vial configuration after installing it.
Some interesting additional details on the Code key
“The Code key was found on IBM terminals as well as IBM Wheelwriter typewriters. In both cases, though, its functionality was basically exactly the same as the Alt key (the left-hand one, not the right-hand one when it is used as an AltGr key) on the PC, to enable special word-processing functions or other special functions of the program in
use. There was also a Code key on the Displaywriter.”
A helpful person emailed me the answer to setting up the toggle keys – the secret to getting the right side blocks 4 and 5 working
In summary you set one key (for example the key between Right Alt and Right Ctrl) to be the toggle key: on the QMK configurator site, go to the Quantum tab and drag the TG key in the Layer and Tap Functions section to the keyboard and then enter in the number 3 in the text box inside this key (to indicate “layer” 3). Then click layer 3 on the left side of the keyboard and drag the Insert/Del/etc. keys to the positions as indicated however you installed the keys (example “Del” on the 6 num pad key).
With this setup, I was told that you can press the toggle key to act as a quasi-num lock key – when it is pressed, pressing the 6 num pad key in the above example will send the Del signal, and when the toggle key between Right Alt and Ctrl is pressed again, it will go back to num pad. I think this is the solution we are looking for to getting the additional right side block keys working but please let me know if this is accurate.
The Model F project newsletter
Please click the blue newsletter button on the right side of your browser window to subscribe. You get only a few emails each year by signing up. https://mailchi.mp/106dffa1b161/brand-new-model-f-keyboards-2022-update-9074837
Descriptions of the original IBM style Icon Keys available on the Extra Keys page
Thanks to the help from a few folks I have put together a description of the Icon Keys on the Extra Keys page, in order from left to right – please let me know if there are any errors or if you have the Unicode codes for the missing items:
Icons Row 1 (Unicode in parentheses):
1. ← Backspace
2. ← Backspace
3. ⇥ Tab
4. ⭾Back and Front Tab / Horizontal Tab (U+2B7E)
5. Caps Lock (U+1F512)
6. Caps Lock (U+1F512)
7. ↵ Return / Enter
8. ↵ Return / Enter
9. ⇪ Caps Lock
10. ⇧ Shift
11. ⇧ Shift
12. ⇧ Shift
13. ⇧ Shift
14. ⌘ Command (Apple/Mac)
15. ⌃ Control (Apple/Mac)
Icons Row 2:
1. <X| Backspace / Erase to the Left (U+232B)
2. <X| Backspace / Erase to the Left (U+232B)
3. <X| Backspace / Erase to the Left (U+232B)
4. ⎋ Escape (Apple Escape) [unicode U+238B]
5. O–>[ ] IBM print screen
6. Padlock with the Up and Down arrow: Scroll lock
7. ⎉Pause / Circled Horizontal Bar with Notch [U+2389]
8. a^ Insert IBM-style
9. a with curved line: Delete
10. ⌦Delete / Erase to the Right (U+2326)
11. ↖ Home / North West Arrow [U+2196]
12. ↘ End [unicode U+2198]
13. ⇞ Page up / Upwards Arrow with Double Stroke [U+21DE]
14. ⇟ Page down / downwards arrow with double stroke [U+21DF]
15. Padlock with the number “1” Num lock
16. ⎇Alt key with arrow (U+2387)
17. ◇Meta / UNIX-style super key / Diamond [U+25C7]
18. ⌃ Control 1.5U
19. ⌥ Option (alt) 1U [unicode U+2325]
20. ⌘ Command 1.5U
21. ⇮ Upwards Double Arrow (U+21EE)
22. List icon
23. ƒ Function / F with a hook [unicode U+0192]
24. ↵ Return / Enter
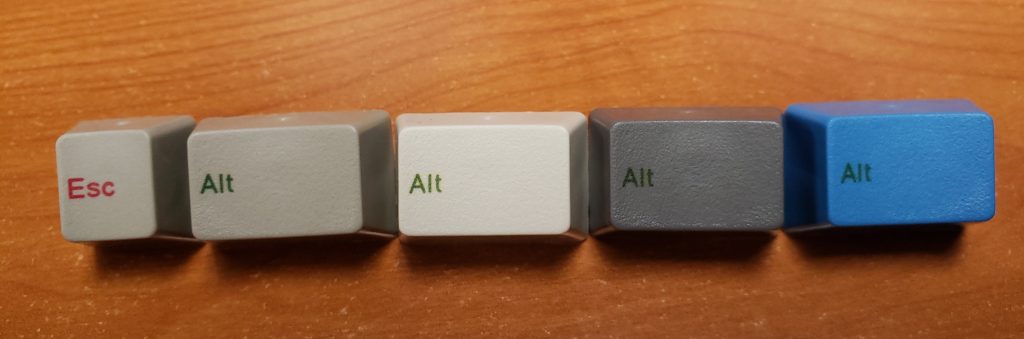
Back in June, the first red and green text dye sublimation keys arrived from the factory and look nice.
Some folks wanted red text esc or green font for the alt key like on the Model M keyboards.